I’ve been into reenactment for nearly 10 years, I’ve taken part in many periods of history. Shoes are always a pain whatever period your doing. The higher the social class and the later the period, the more you need shoes.
One style of shoes that’s got a long timeline is turn shoes. Simply called, because you make them inside out… wet them… turn them though… simples
I’ve never made shoes, always bought cheap turn shoes. Used them for a season, replace them. Then as I got into the horse side of things, the need for higher status shoes meant I moved away from turn shoes.
To me, buying a pair of £50 turn shoes was worth the price of not having to sew…. I hate sewing… a lot. Nothing’s changed over the years, I still hate sewing.
What had changed though, I now have a child. He came to a show to watch and loved it. However, he didn’t understand that he can’t come and go through the crowd barriers, he can’t just come and sit with his dad.
My plan at this point, get him into kit for the next show. Luckily this was the last show of the season – so I had time to get this sorted.
Knowing nothing about kiddie kit, for any period… one thing I did know, he would need shoes, and turn shoes would be great. Looked online for some – £50. Ummm same as what I would spend on a pair for me, however he wouldn’t get a years use out of them. Kids, for people that don’t have kids, kids grow fast. You might get a few weeks out of an outfit before it’s too small.
Having never made shoes, but knowing the theory of what is needed and knowing that there’s about 8 months before my son will need to use them, as well as knowing that he will have grown out of them by next month…. I’m going into this knowing this specific pair of shoes are just a test. Can I make a pattern? can I sew them? and most importantly – do they fit him? I’m treating these as a test. Work out the process and any gotchas.
Making the Patten
A pattern is, the 2d representation of an object, if it had been peeled, laid flat, and then to that, extra material added to join to other parts.
To to make a pattern, you first need to take some measurements, and take some shapes from the person. Then, how I do it, is unfold the thing in my head, lay it flat, and draw that shape out of a sheet of paper. This shape needs to be sized to the shapes of the person. This is going to be mostly trial and error.

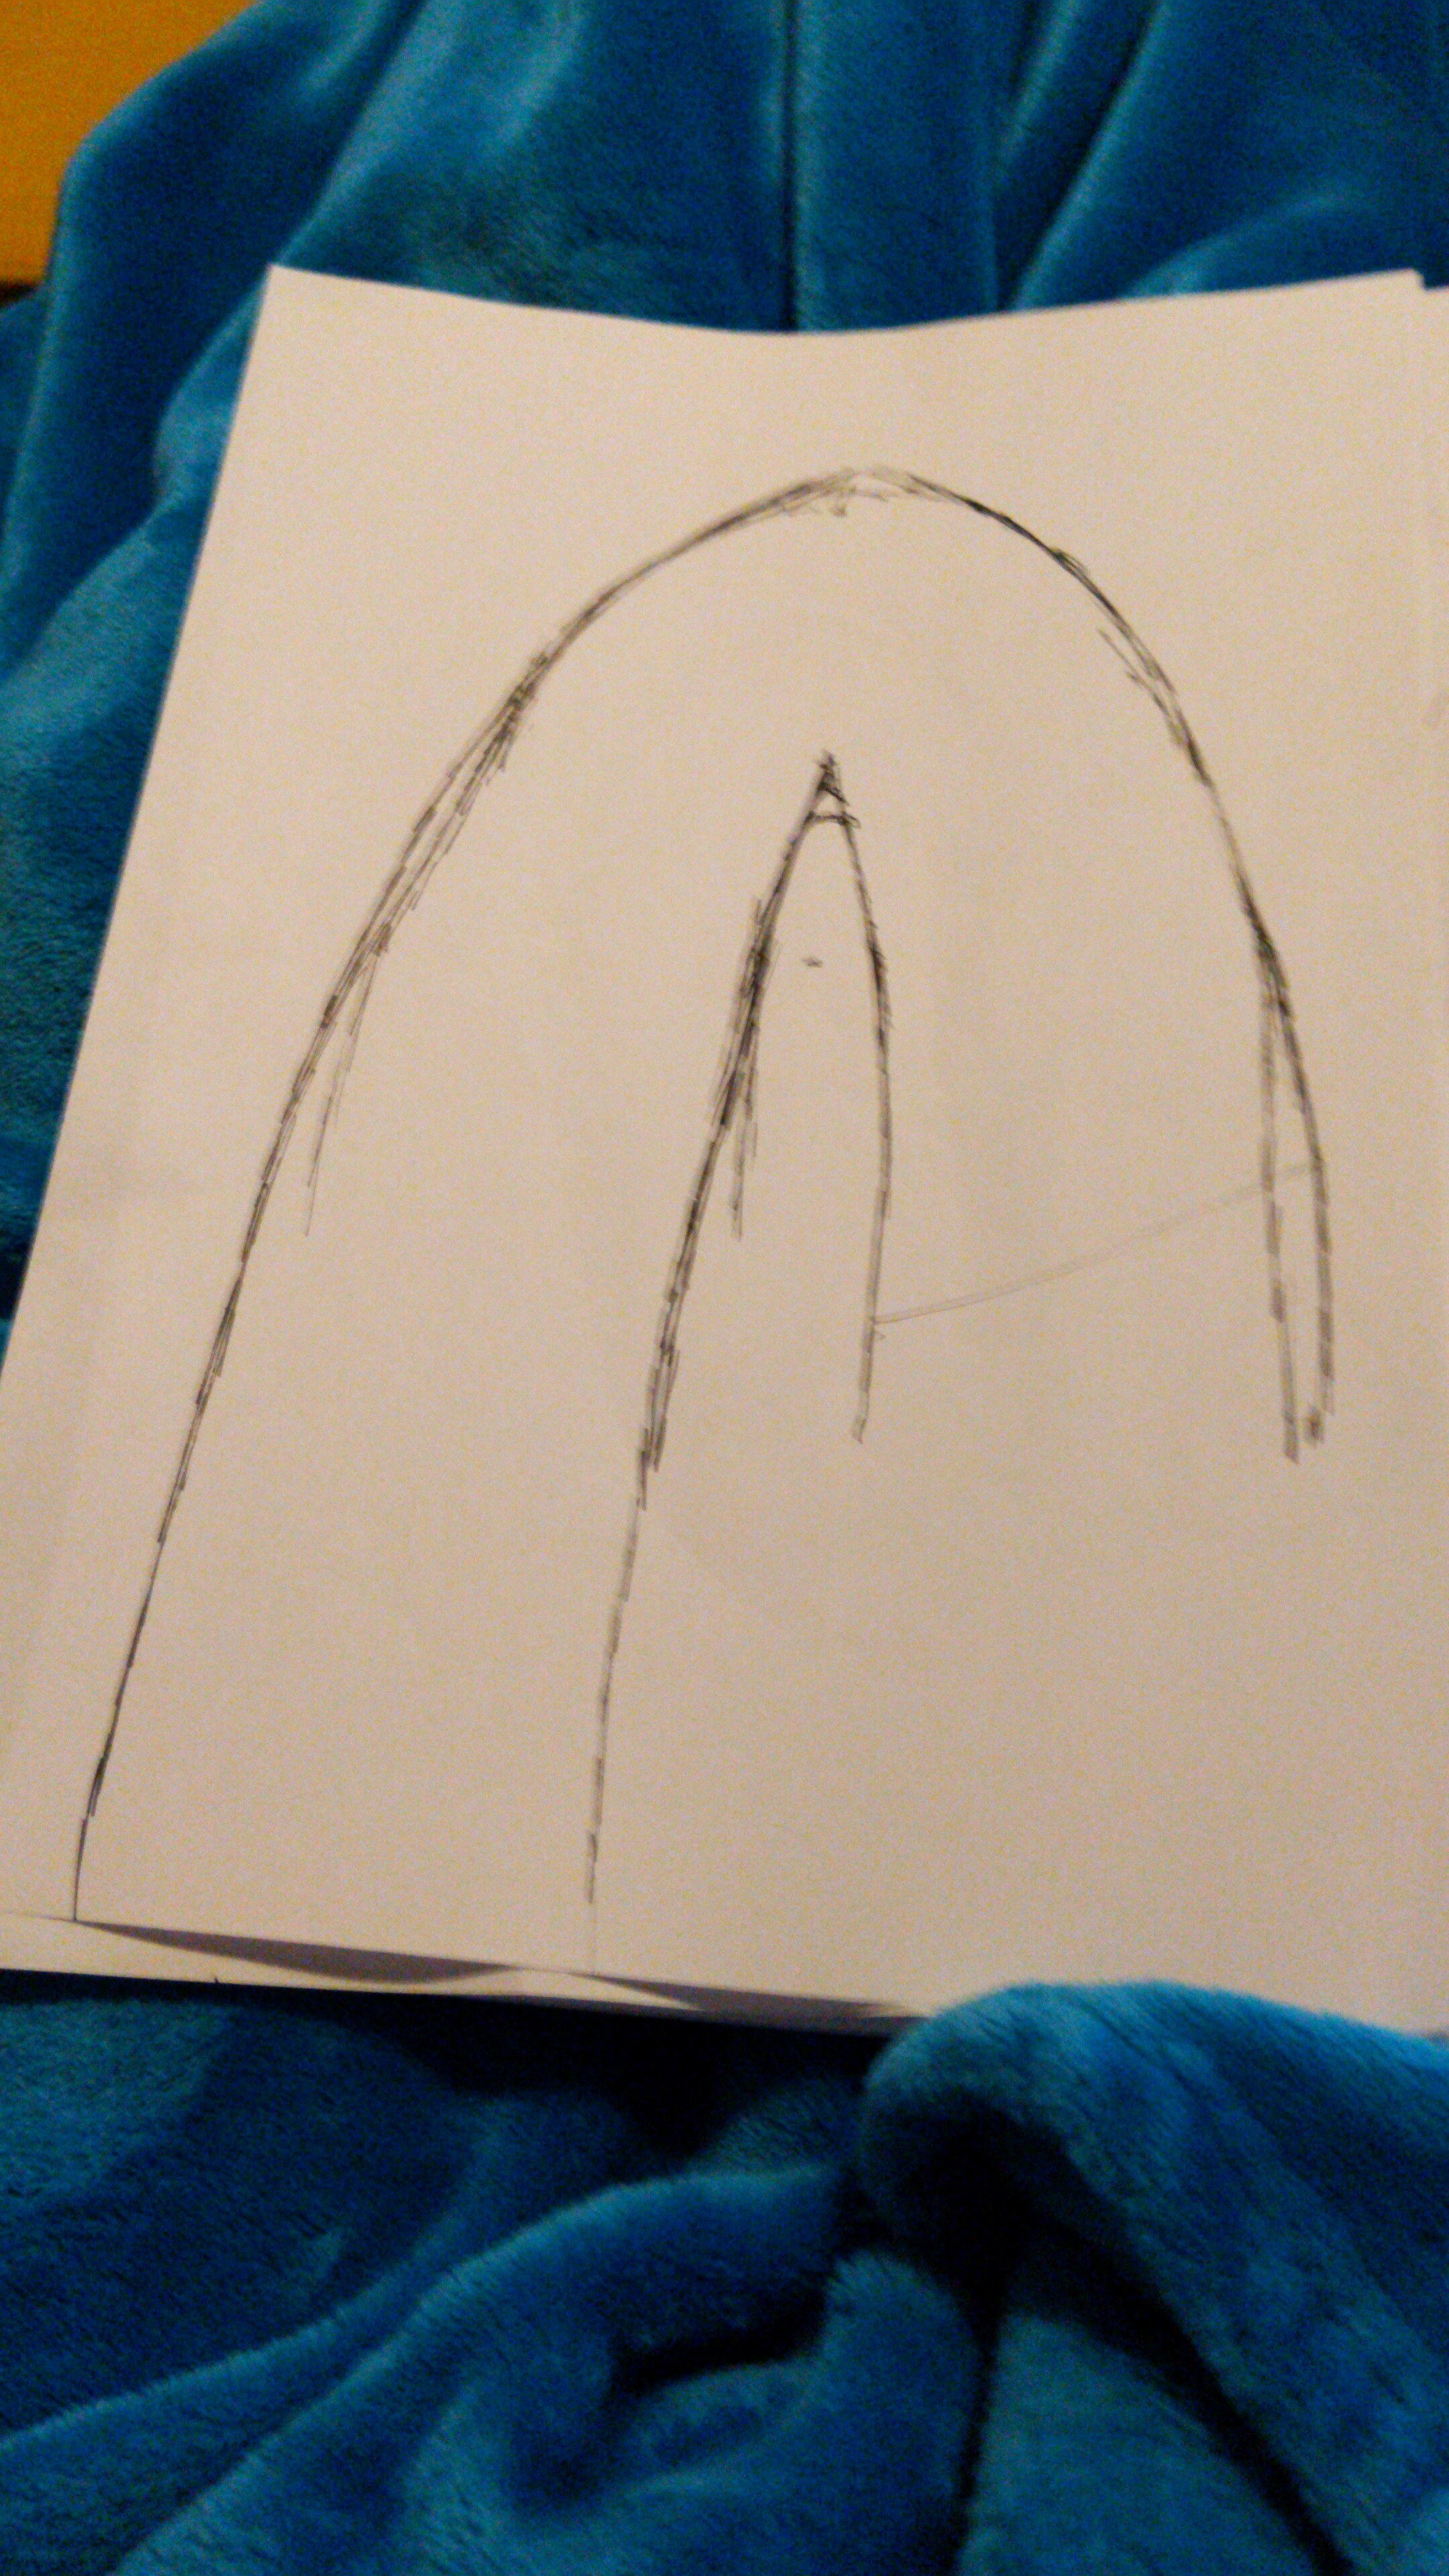
So, first thing I did was draw round my son’s feet. And measure a loop round the ball of his foot. The ball of the foot is the widest part, and a joint, so this is a good place to take a measurement from. I also took a measurement from the widest point, round the ball of the foot, i.e the smallest loop you could pull up over your foot, and up round your ankle.

Once you think you have an idea of the pattern. Draw it out, cut that out, using tape or a stapler … Put it together.
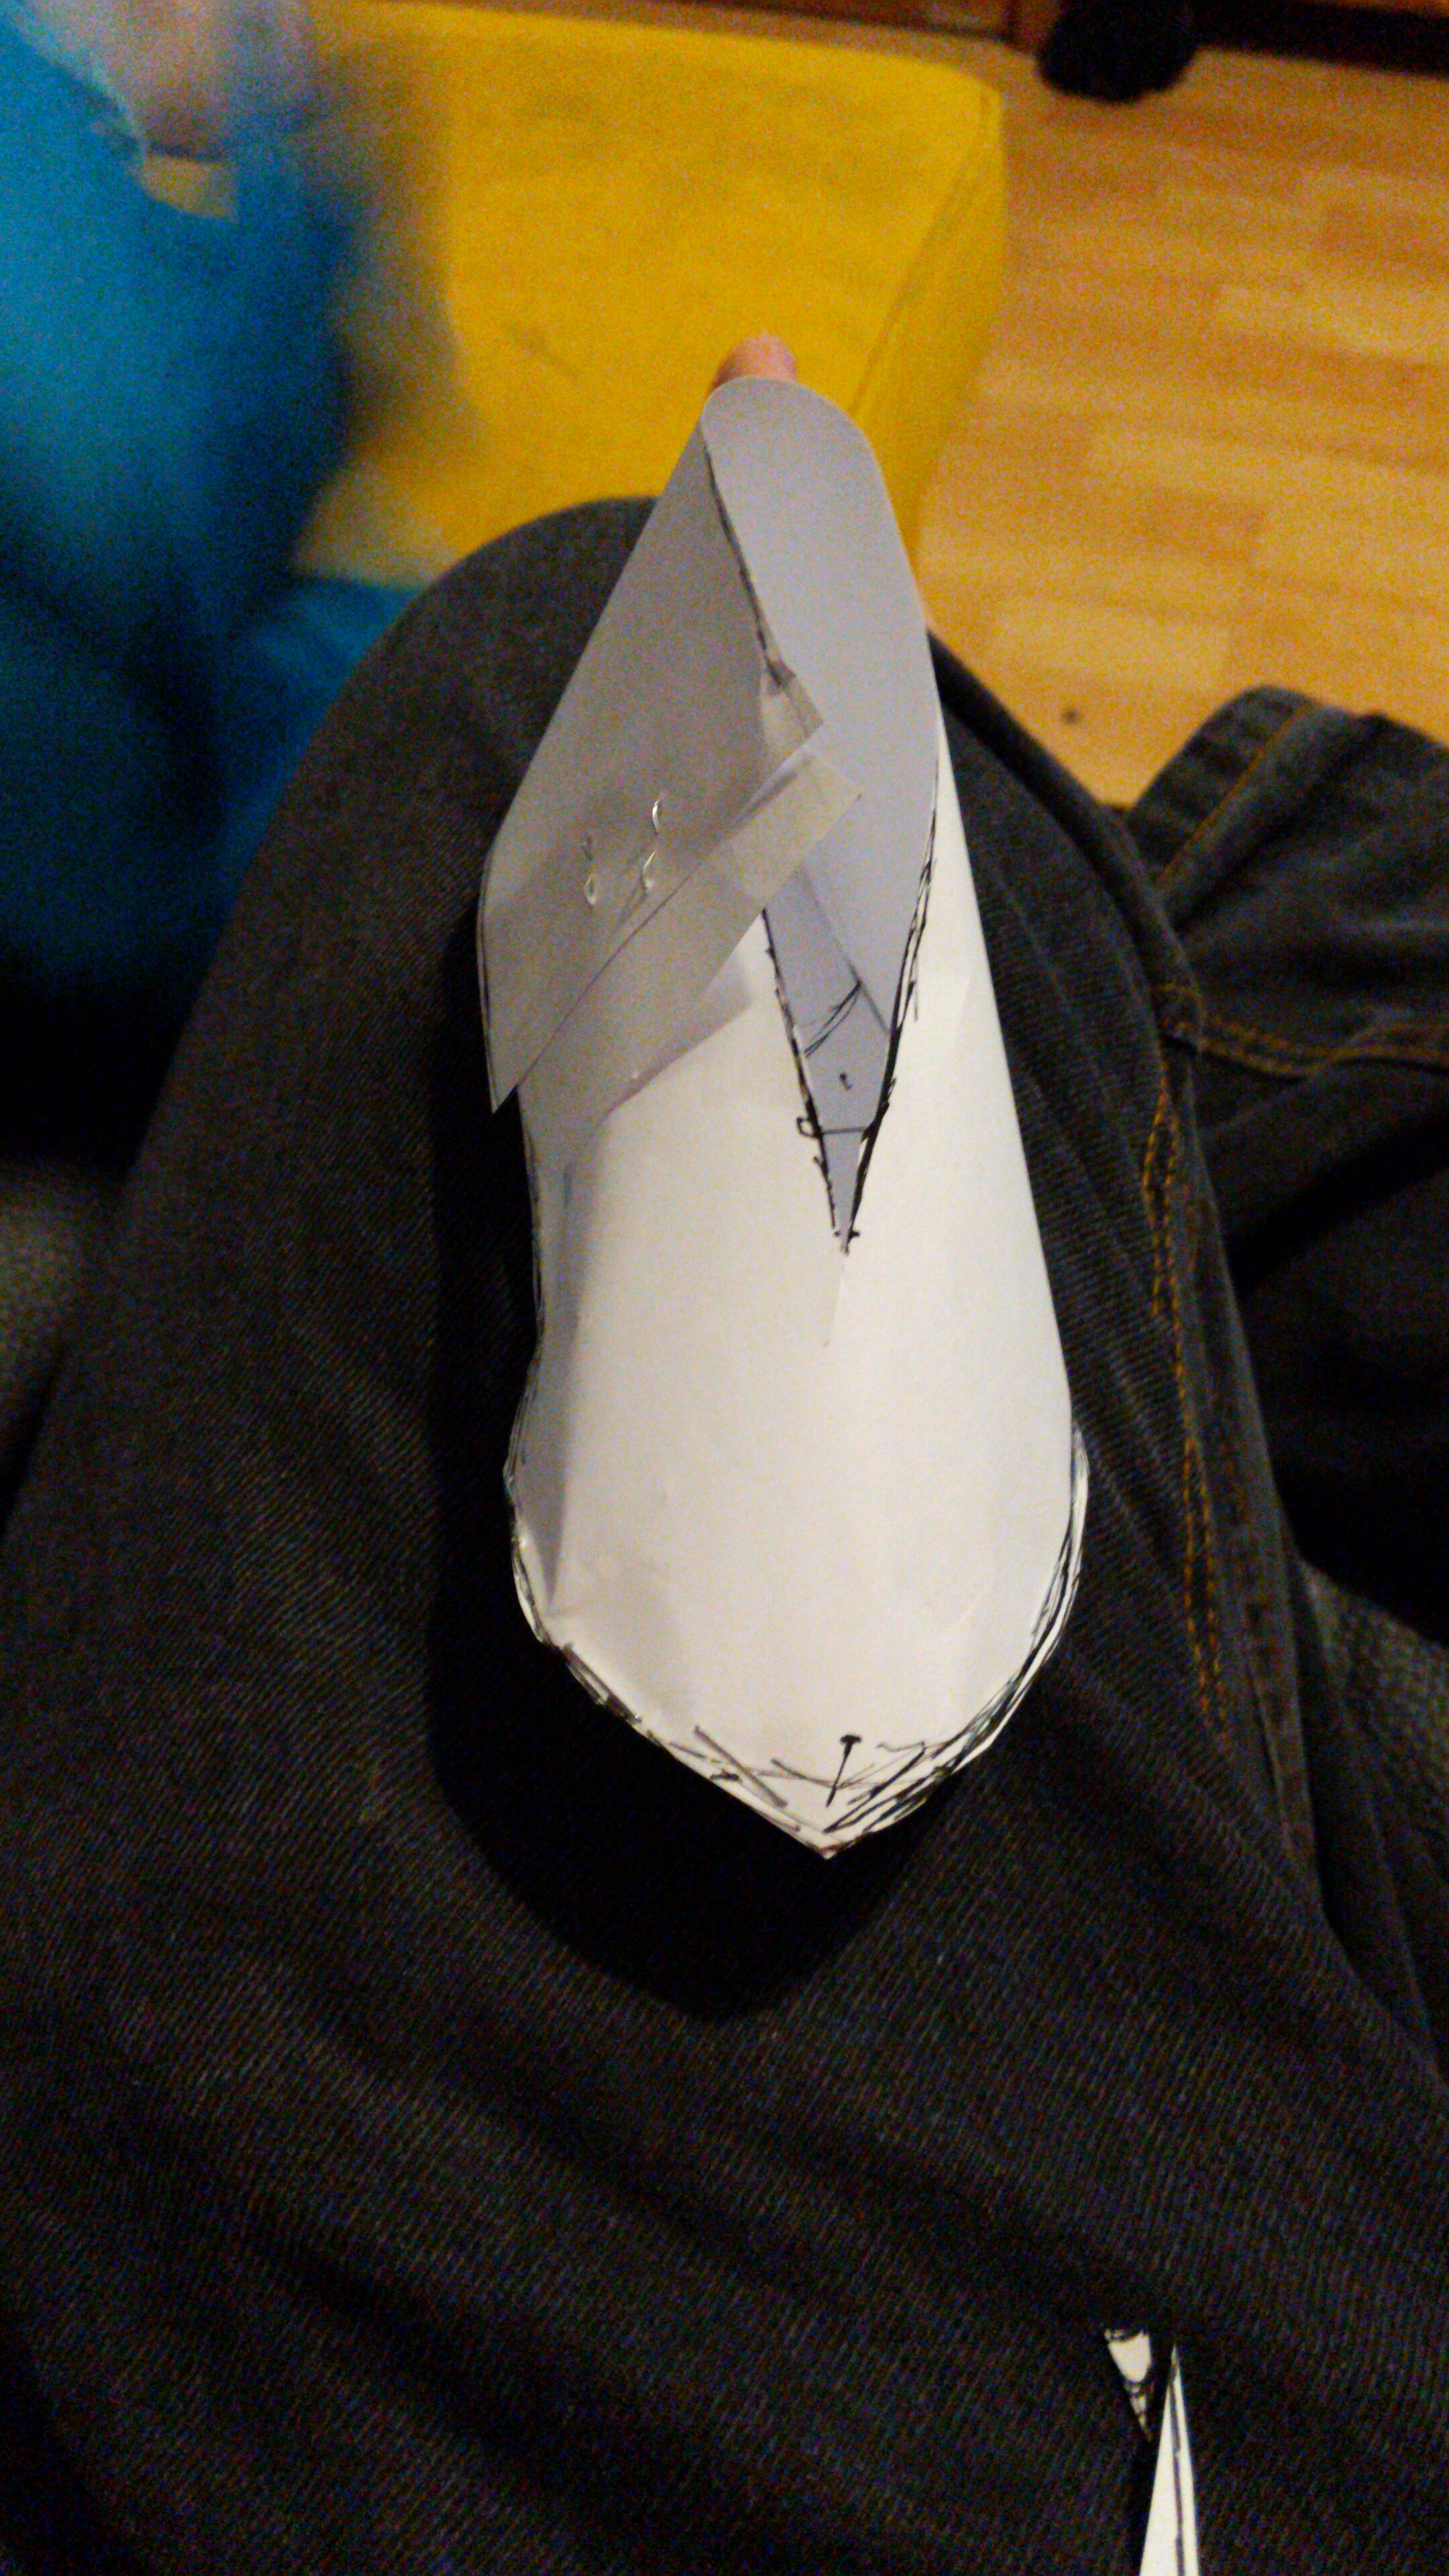
Several iterations later.. you have you best estimate at a paper shoe, made from your pattern… Disassemble and cut out of leather.
You’re going to want to use a soft supple leather for the upper, and a more rigid tough leather for the sole.
Remember turn shoes are made inside out, so having the skin side ending up on the outside you need to mark and cut out a left and right pair from the rough side of your leather.
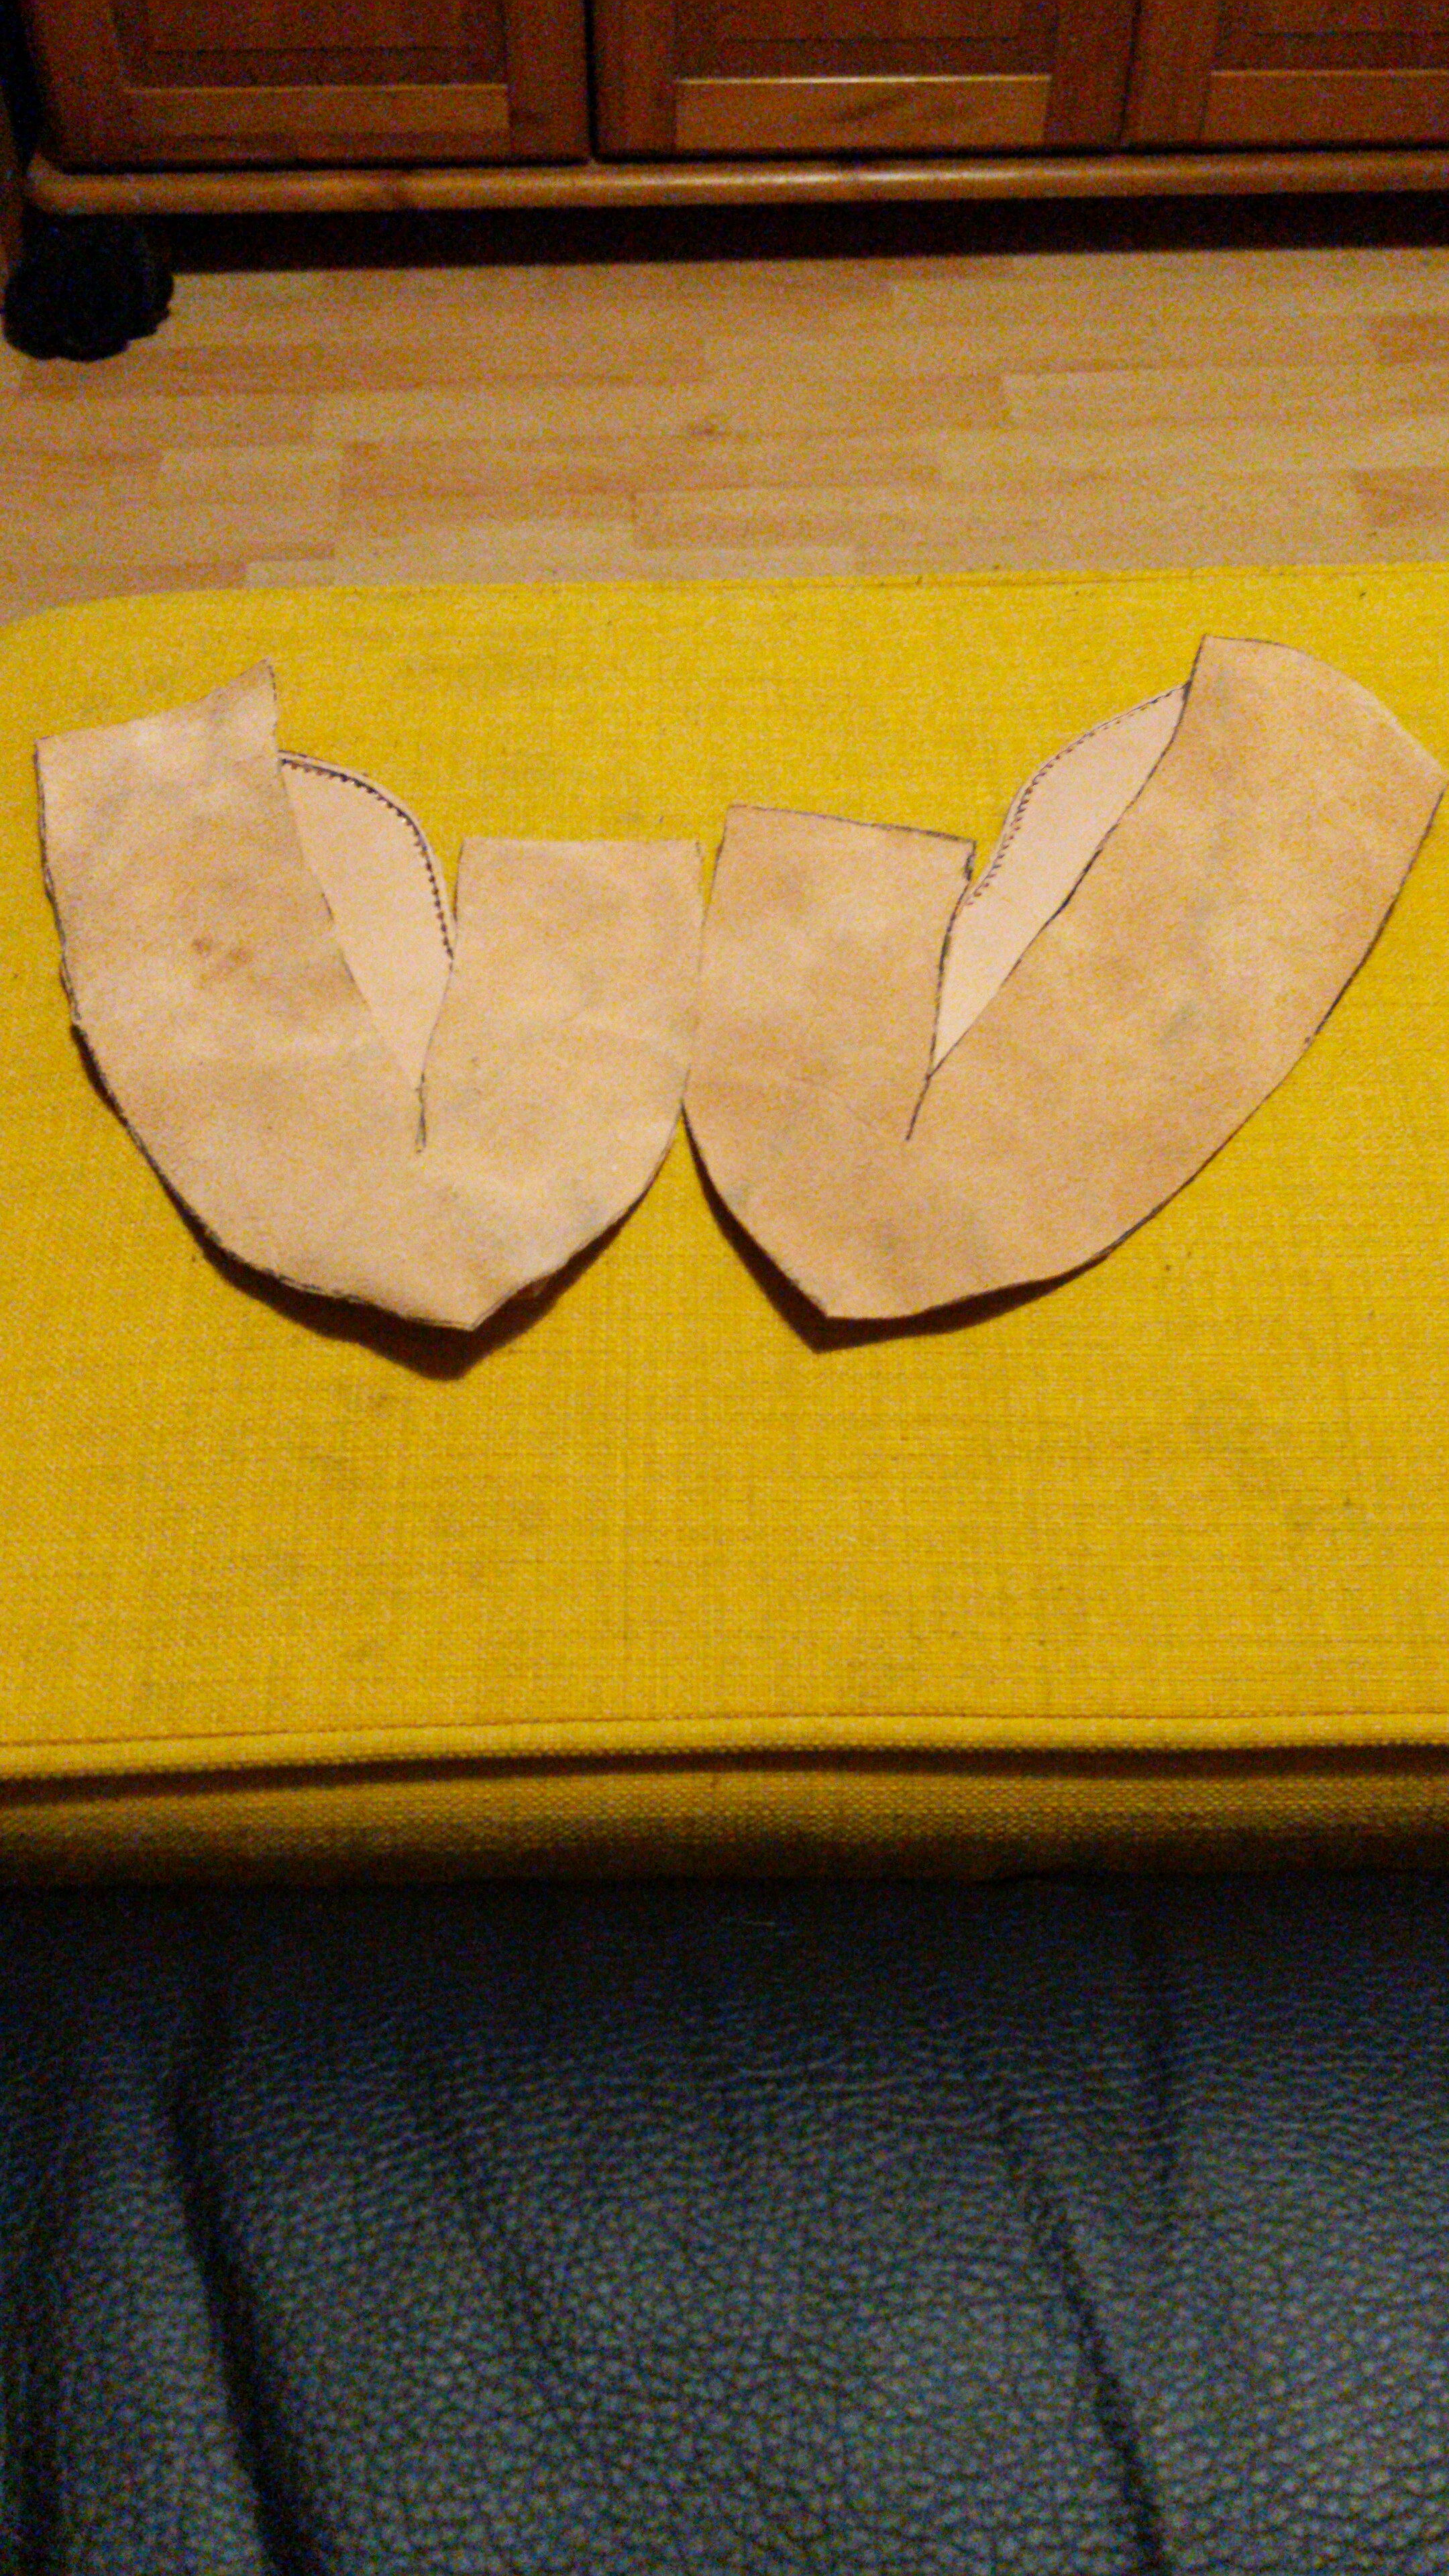
Mark and pre make all your stiching holes to ensure a smart neat easy assembly. If your me, you will then spend the rest of the day sewing … then do it again for the other foot.

Both shoes sewn up, your going to need to do the turn part of the turn shoes. Drench and soak them in water. And turn them through
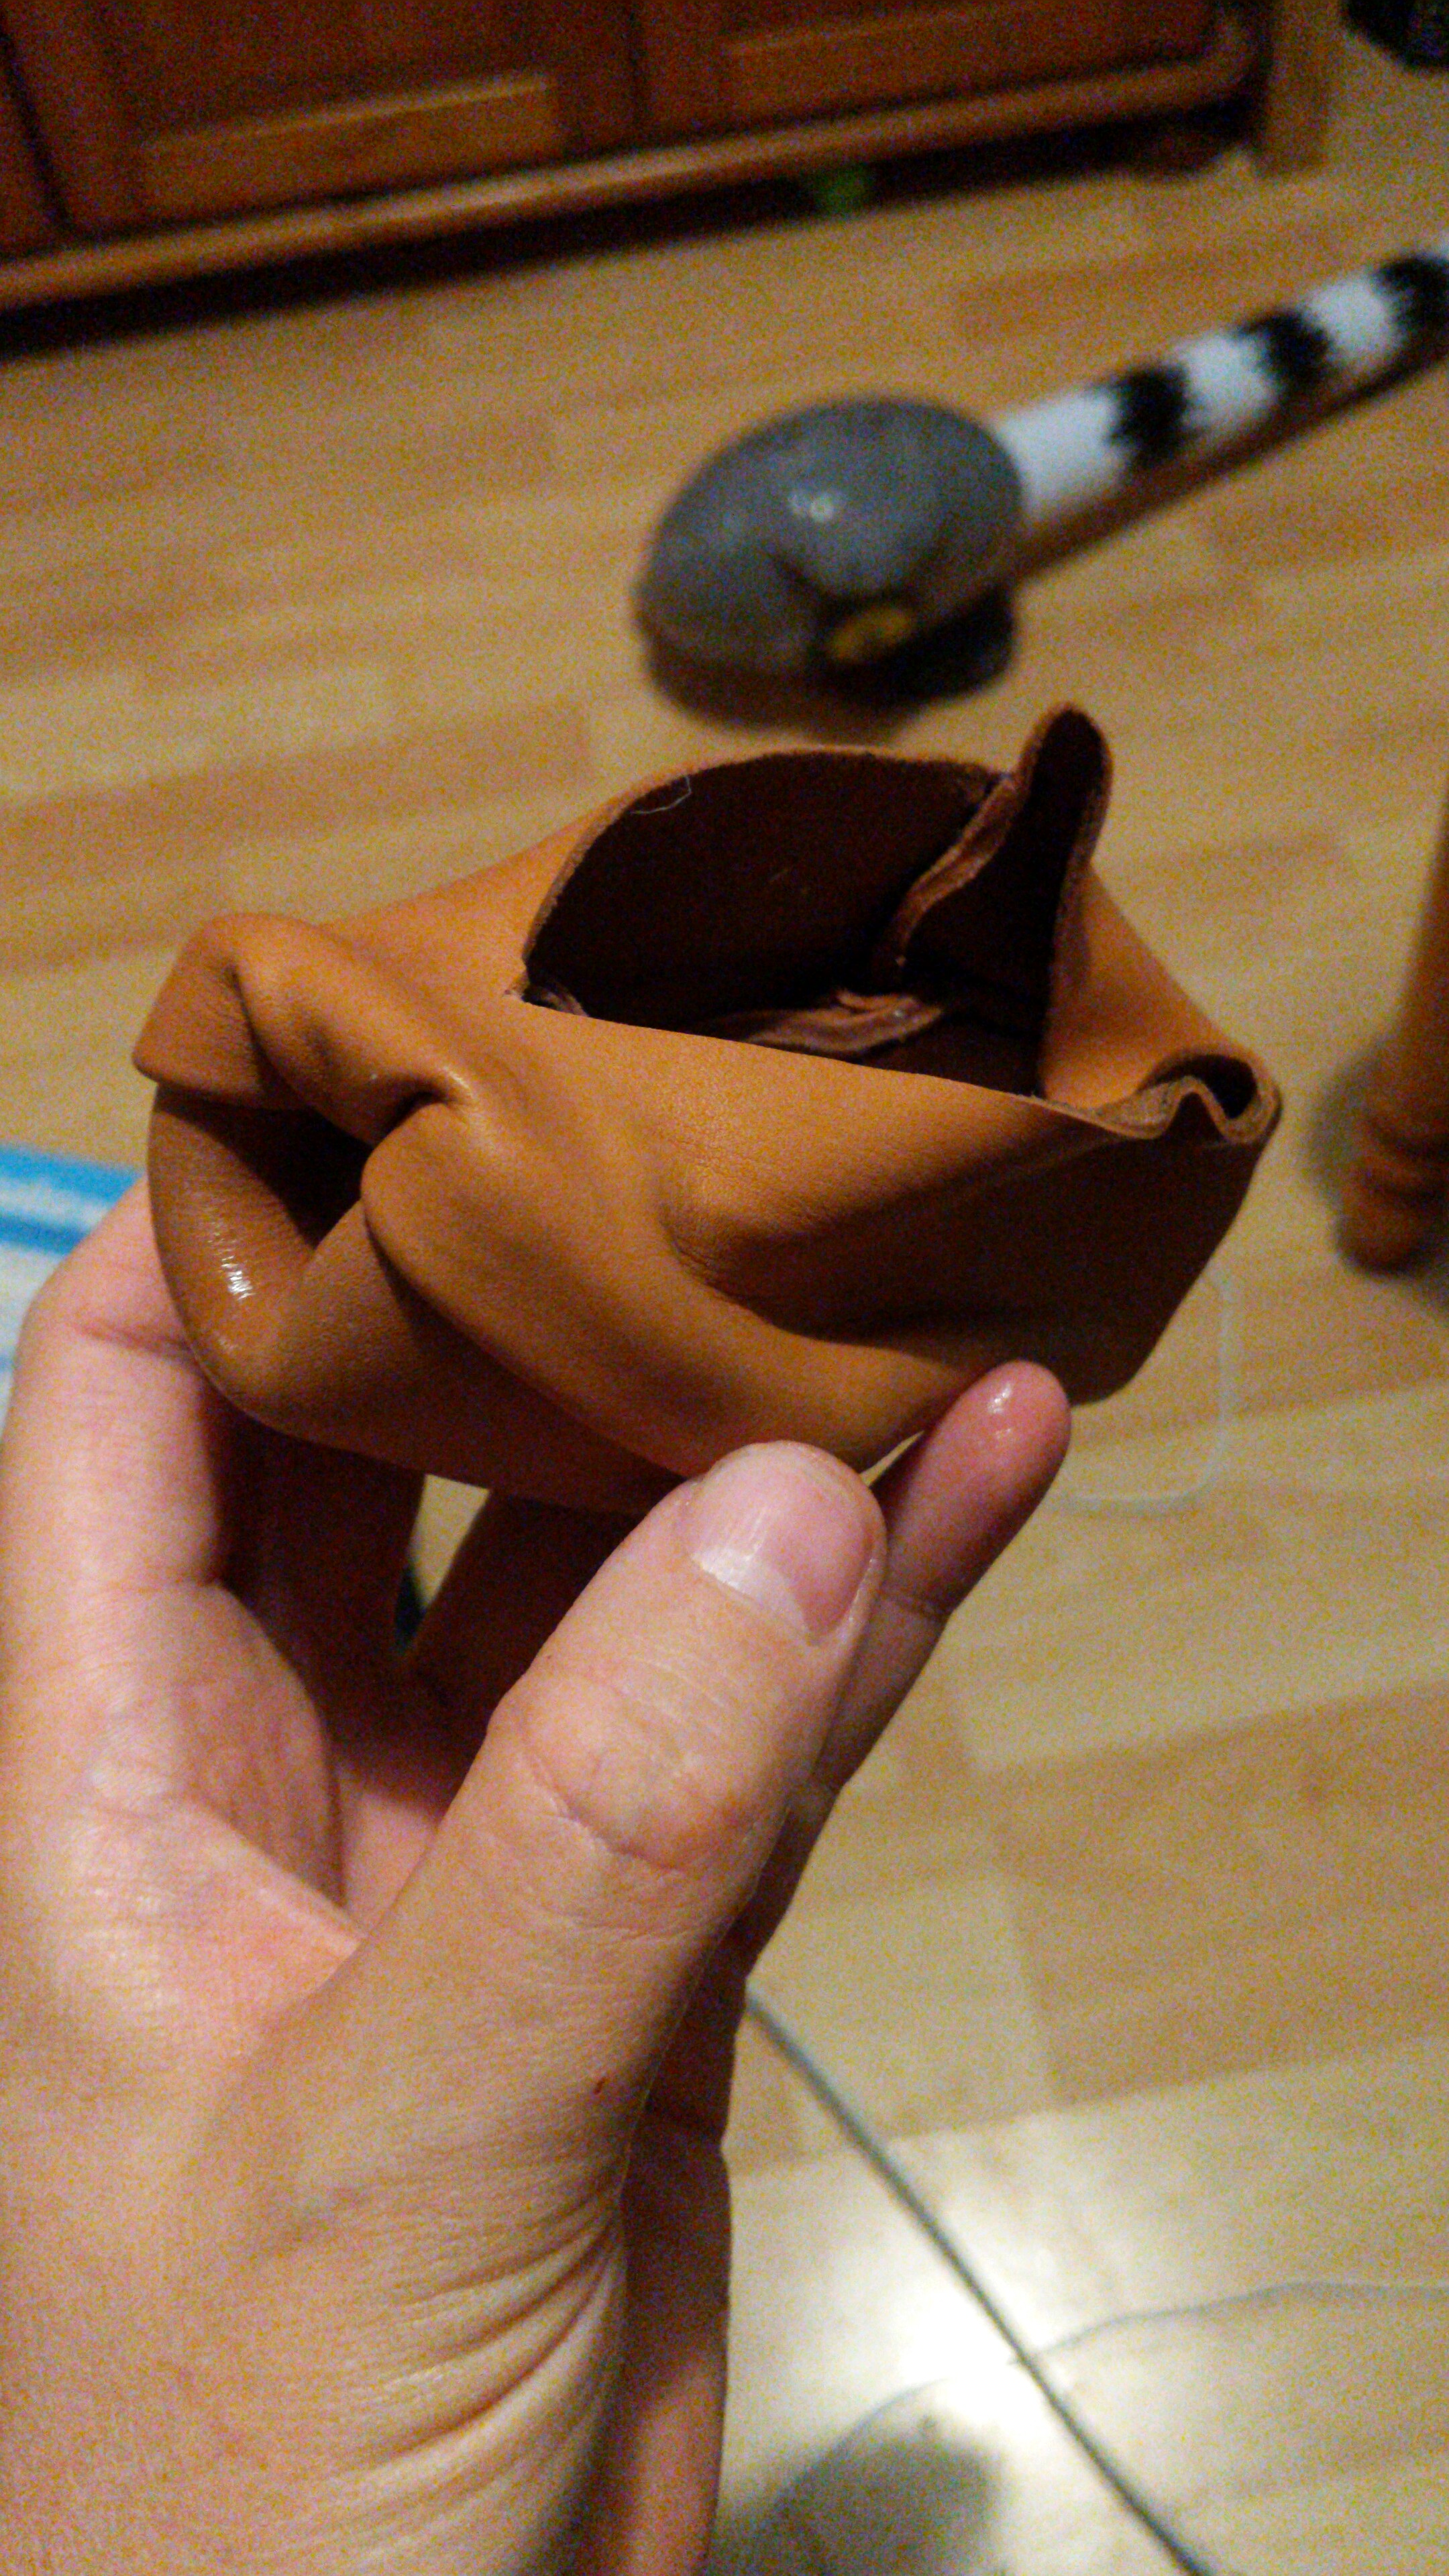
It’s gunna be tricky, just keep working it… smaller shoes are going to be tighter and more effort.
This is one of the gotchas small tight parts will bunch up and be difficult to turn, in your template, avoid points especially on small shoes… if you do want pointy shoes, plan to leave extra space for the bunching and space to turn it through.
Once tip, use a bit of long thin wood, for example.
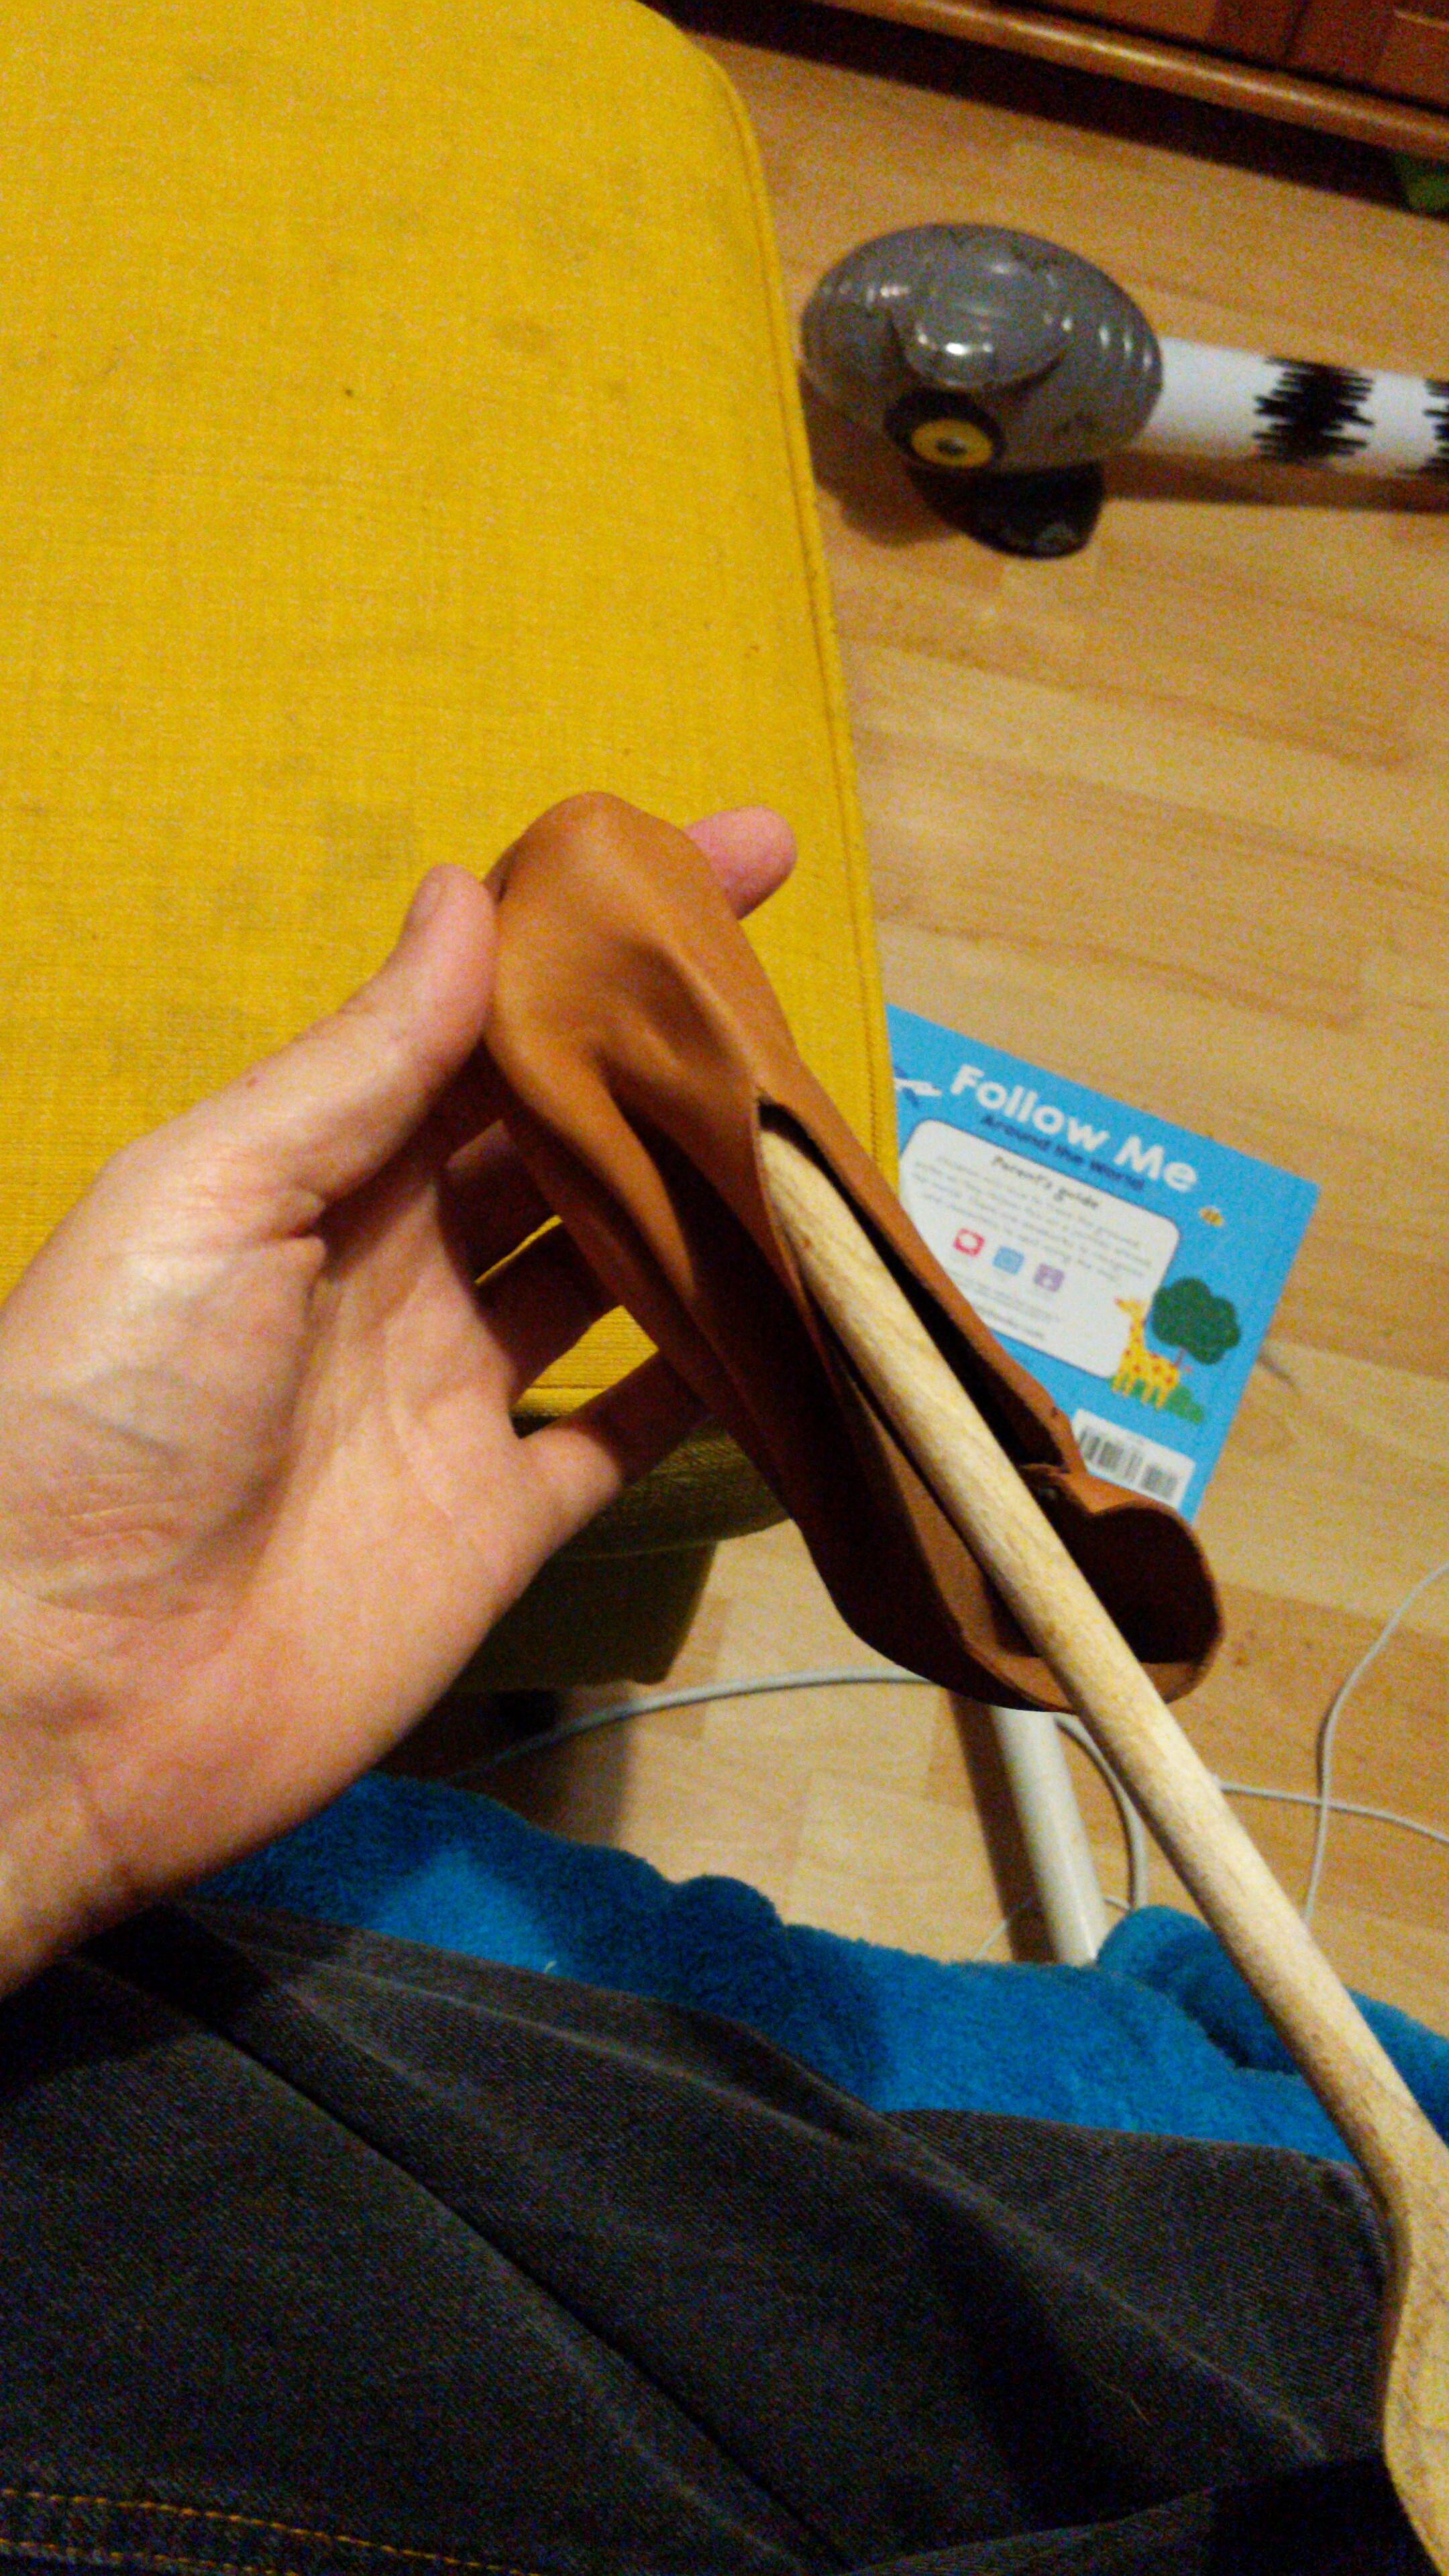
Keep working and moving the leather, keep it damp

Once that’s done, do the other one. I had a lot of trouble with this bit. Partly because I have never done this before, but I think for the next pair I inevitably have to make, I can tweak the pattern to make turning easier.. the toe for small shoes won’t be as pointy, I’ll make them more stubby. Plus I’ll have done it once now, so I now have an idea how tough I can be with the leather and how much force I can use/need to use.
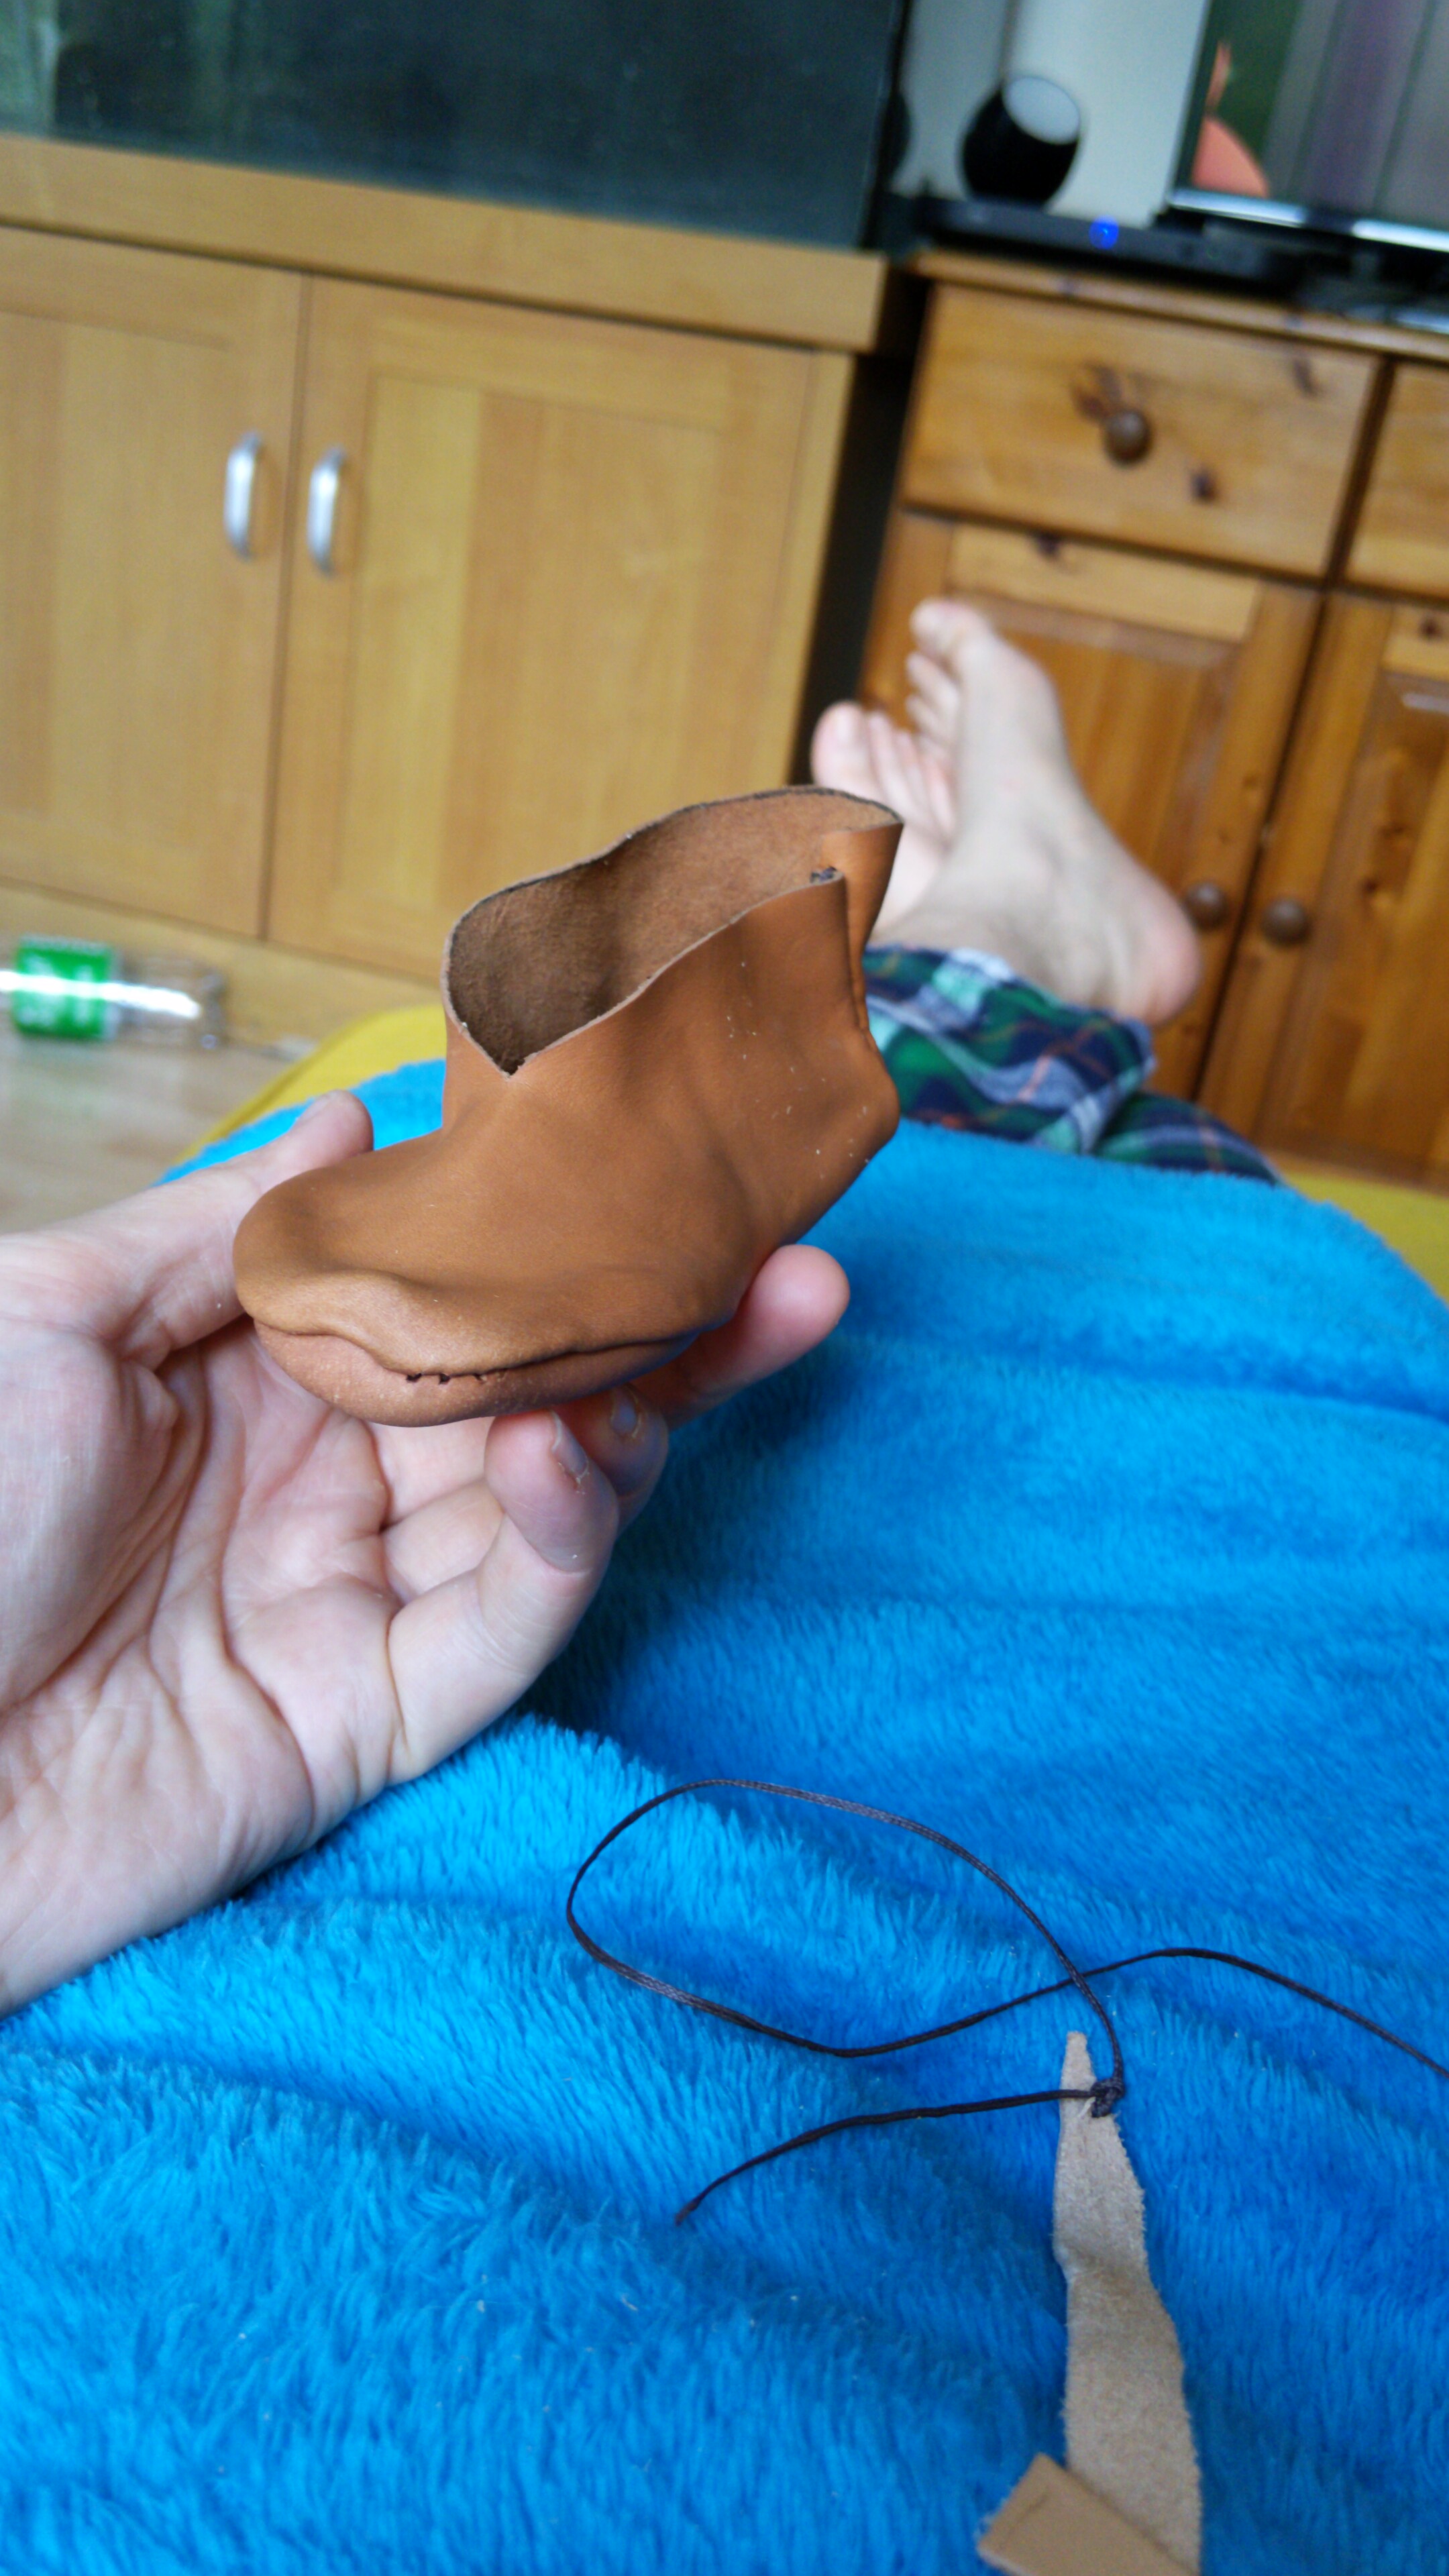
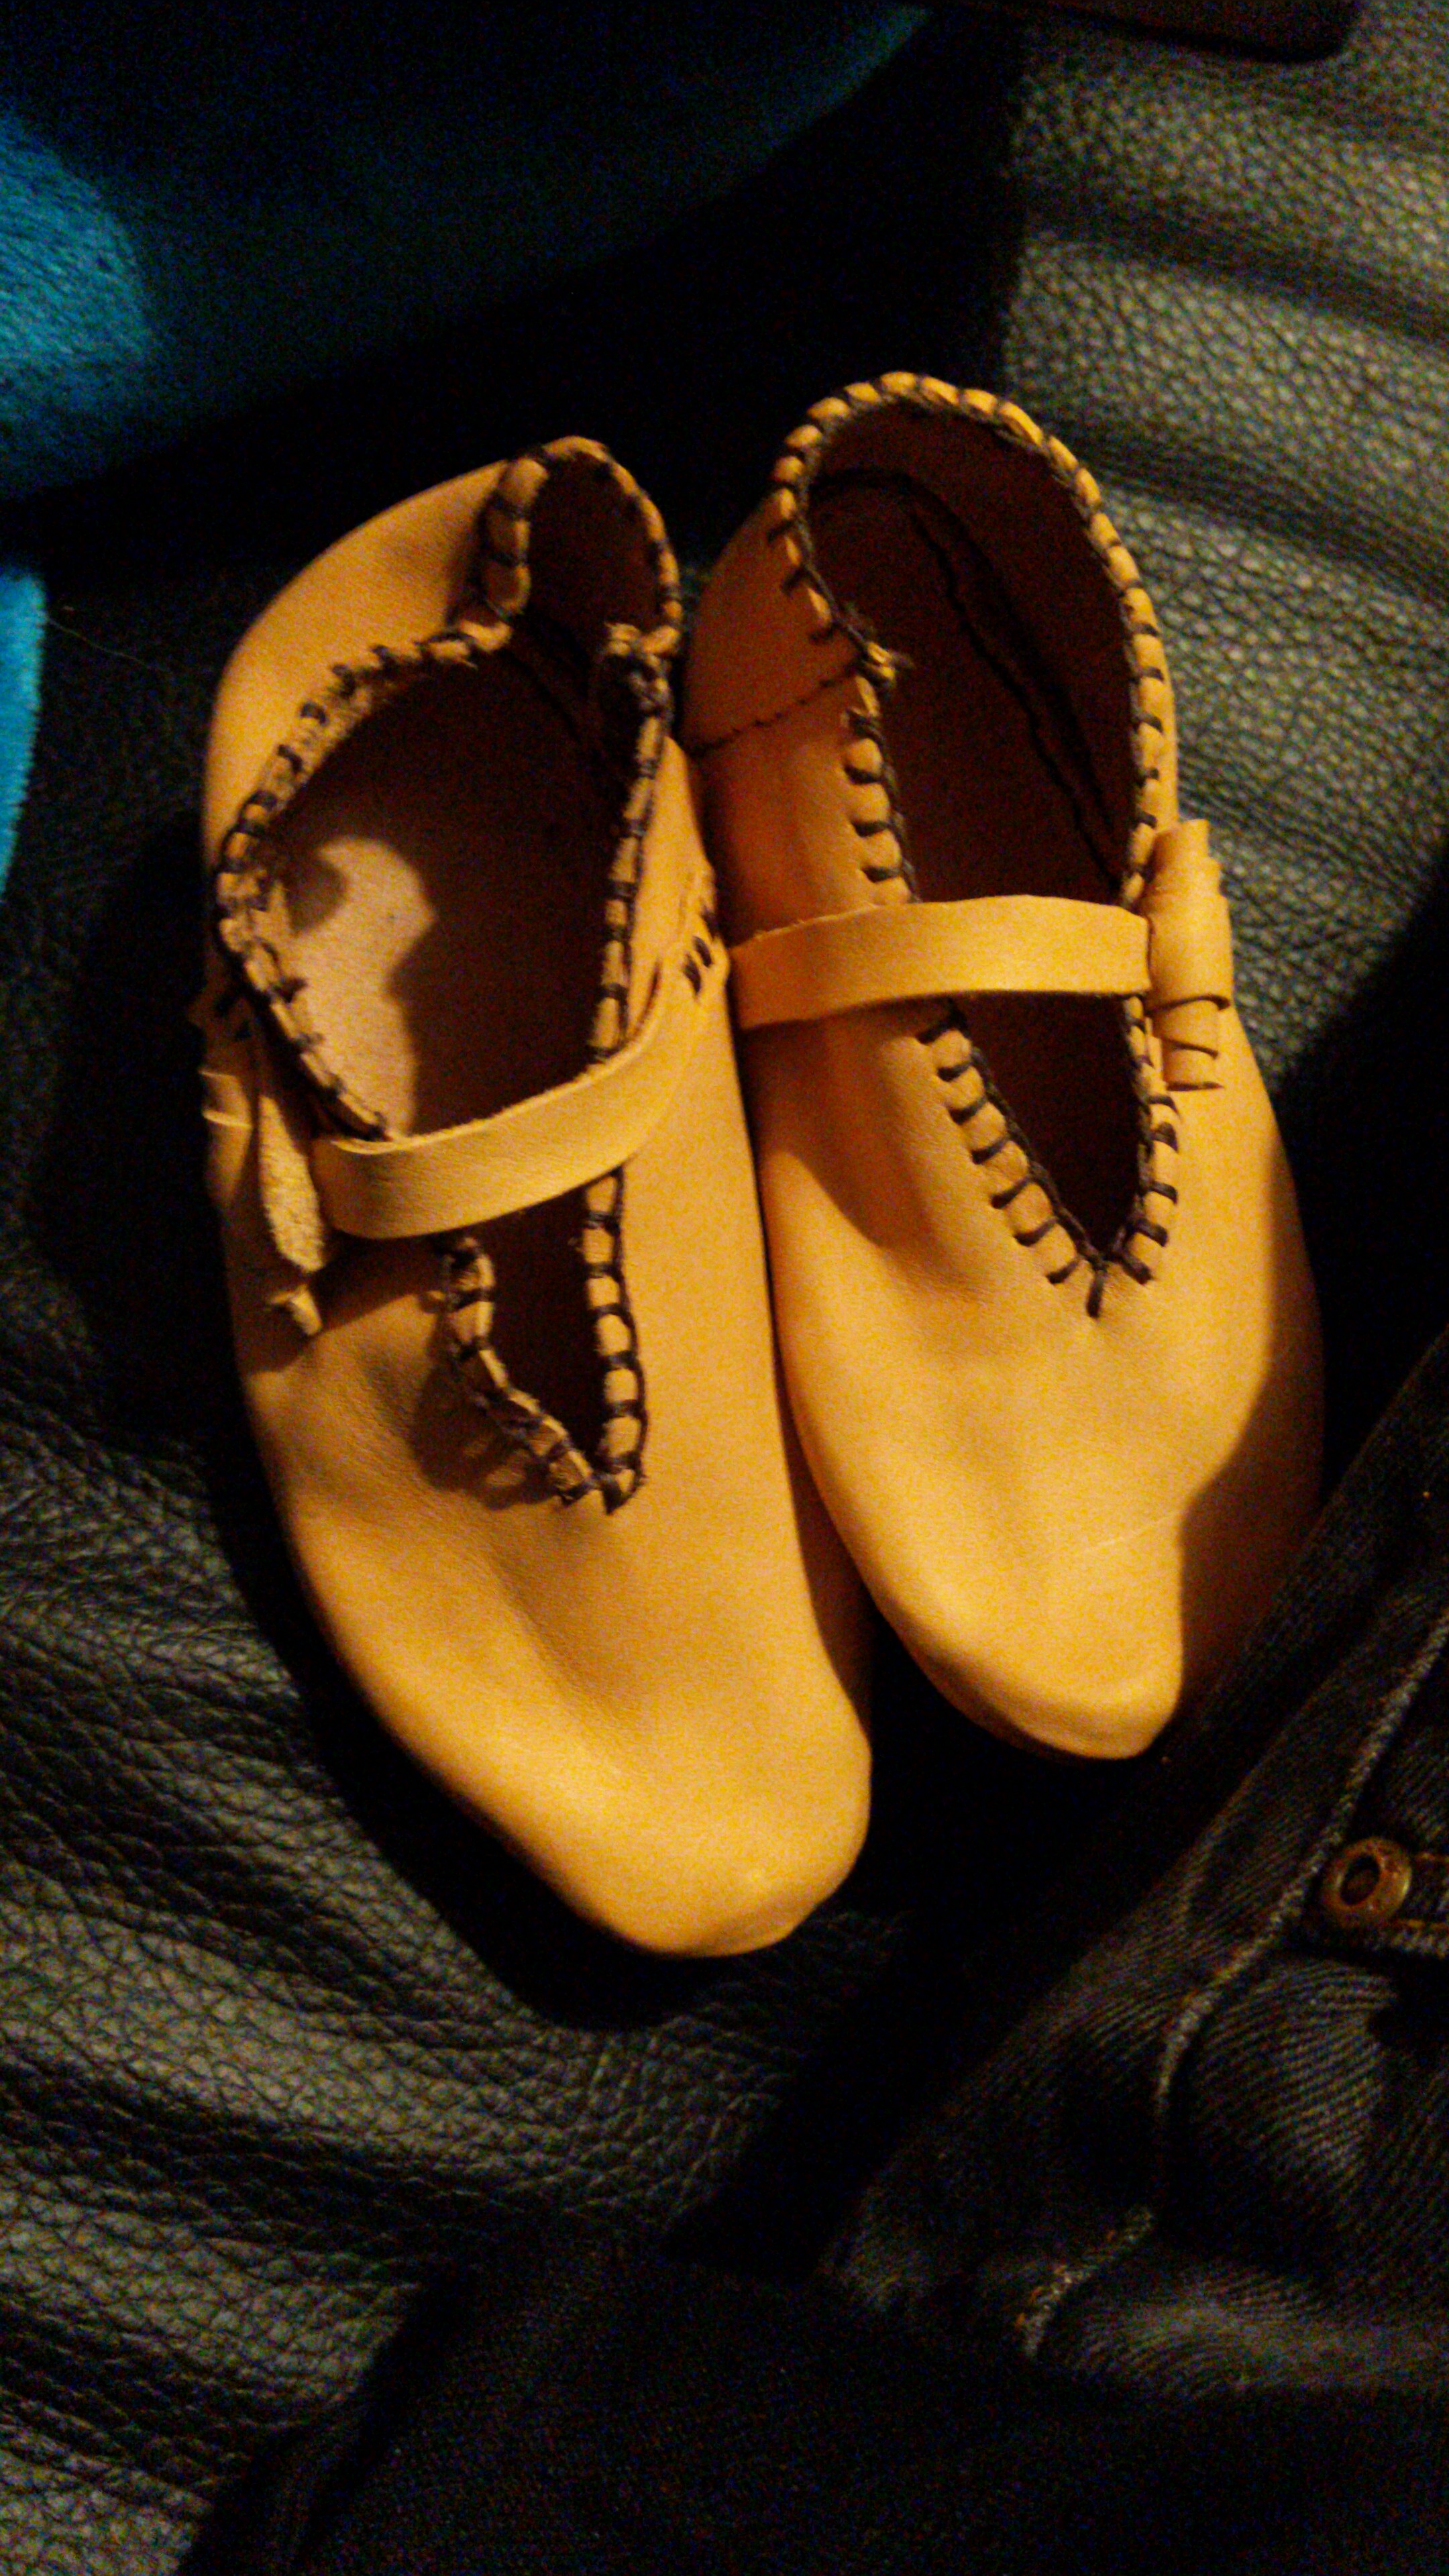
I chose to add a toggle and loop to help keep the shoes on and some stitching round the foot hole to stop the leather stretching. These being “Test” shoes to work out the process of turn shoe making. I tried a different stitching on each shoe, again experimenting. So, the finished article…
Now, I’m going to oil/dye these. My son’s probably going to wear them once, maybe twice in the house… but my unborn daughter, she might get some use from them.
If you plan to make some shoes, go into it with a open mind, plan to make 2 or 3 pairs before you have something. If you’re trying your hardest to make a perfect shoe it won’t be fun, you won’t learn anything, and you will be disappointed when it’s not how you imagine your perfect pair of shoes. Instead, if you go into this expecting to not use these experiments as actual shoes, but as learning, and just a step to making your perfect shoes. You might surprise yourself, as I did, that they are not perfect, but totally functional.
Remember you can’t wake up having never made a pair of shoes, and expect the 1st pair of shoes you make to be perfect… but you can make a pair of shoes